Each summer r/roguelikedev has a summer event[1] in which we all make a simple roguelike, roughly following the libtcod roguelike tutorial. I’ve tried several times and actually finished in 2020, using rot.js[2] and Javascript. Last year, to keep the scope down, I told myself to implement only the topics from the tutorial, but make a list of things I might want to change. Since I started with last year’s code, it’s already playable:
(Icons from game-icons.net[3], CC BY 3.0, see source of _symbol-table.html for list of sprites and their authors)
This year, instead of going through the tutorial again from scratch, I’m going to revisit each chapter and try doing things differently. High level goals: tile graphics, thin walls (requiring a new map generator and a new field of view implementation), noun-verb user interface[4], more interesting monster behavior, redesigned stat and combat system, new control scheme, a small amount of animation.
Source code: game.html + roguelike-dev.ts (build with esbuild) - and on github[5].
1 Setup#
It’s been a few years since I’ve used Typescript, and I wanted to dip my toes into it again, mainly because of the existence of esbuild[6], which is much faster and also handles bundling, two issues I had the last time I used Typescript. I switched the source code from Javascript to Typescript, renaming roguelikedev.js to roguelikedev.ts and adding a build step:
#!/bin/sh
esbuild roguelike-dev.ts --bundle --platform=browser --sourcemap --outfile=_bundle.js
Esbuild is very fast and doesn’t require me to have package.json etc. However it doesn’t actually check the types; I only check the types in the code editor, using language server (lsp-mode in emacs). Since I’m converting from Javascript, some of my code is written in ways that Typescript can’t verify the correctness, so esbuild not forcing the issue works better for me right now.
One thing I want to have is a way to convert to Javascript preserving formatting, only stripping out types. Unfortunately, Esbuild throws away comments and formatting while stripping out types. The Typescript compiler is a little better, preserving comments but still changing the formatting and newlines. There are some workarounds on this page[7] if I ever need to convert back to Javascript. Until then, your best bet is to run tsc -t esnext roguelike-dev.ts to produce roguelike-dev.js, which will be pretty close to the Typescript with the type annotations removed. If I ever want to give up on Typescript, or if my readers want to use Javascript instead of Typescript, this will come in handy.
I went through the code and put in some (not all) types. There are a few places where my code was a bit sloppy so I had to clean it up to make the types work. I expect to add more types over time.
2 Display#
This feels like a big change. I’m switching from ASCII to graphics. I wanted to break it up into smaller changes that I can think about, implement, and test.
2.1 SVG#
The first change is to keep the ASCII but render to SVG instead of rot.js. Here’s the old and new renderer:
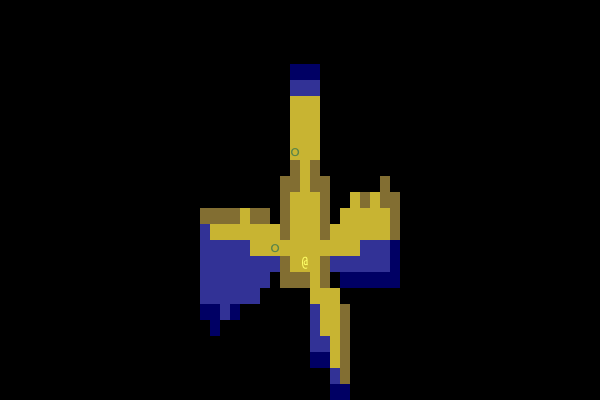
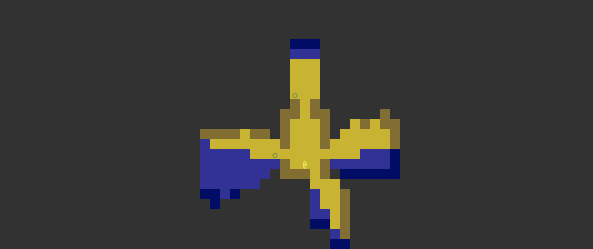
The main difference is that the new renderer has square tiles. I’m planning to use square sprites so this is the size I will want. It looks funny right now with ASCII characters. In last year’s tutorial I made the map size 60⨉25. This makes sense for a terminal with tall characters, but I expect a different size will work best for square tiles.
2.2 Sprites#
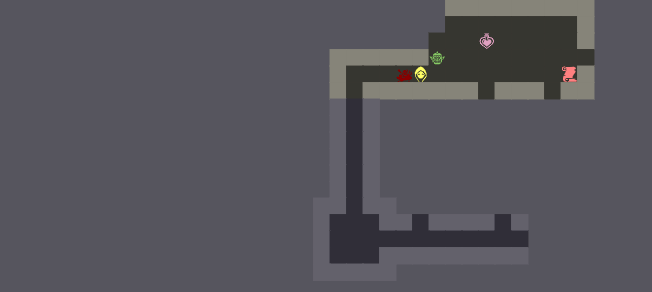
The second change is to switch from ASCII to sprites.
- I modified the entity properties to include a sprite name, like “cowled”[8].
- I extracted the sprites into a
<symbol>table using a python script I wrote
It turned out to be incredibly easy to implement:
But it’s too hard to read now! That’s one of the advantages of ASCII: our brains have a lot of practice recognizing letters, but not a lot of practice recognizing this project’s new shapes.
2.3 Readability#
The map used to be 60⨉25 = 1500 tiles with tall narrow character tiles. The SVG map uses square tiles, so they were half the size of the old tiles. In addition, the vector art has more detail than the ASCII characters. To improve the readability I’m going to:
- make the tile sizes 20% larger (by decreasing the map size to 40⨉30 = 1200 tiles)
- increase the foreground/background contrast (by not using yellow/blue for fov, and changing icon colors)
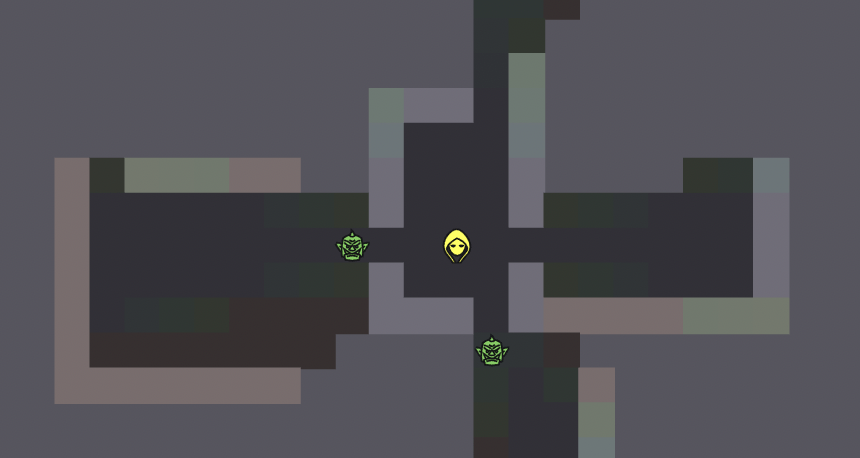
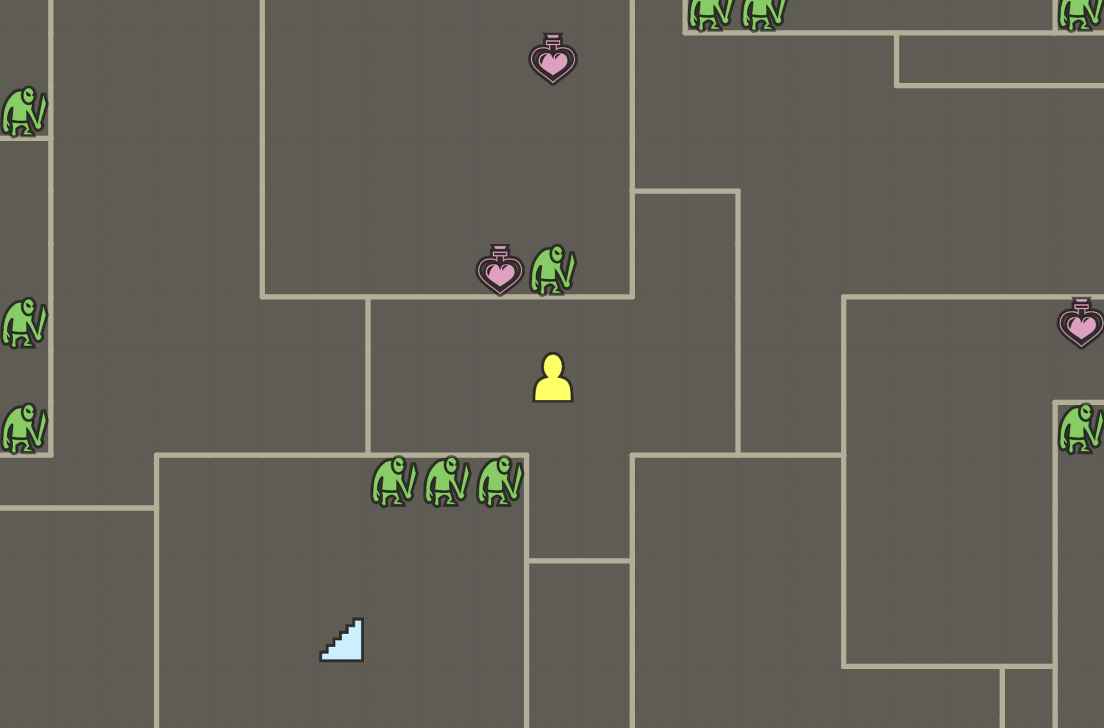
I think the sprites are more readable here than in the previous screenshot.
2.4 Multiple objects per tile#
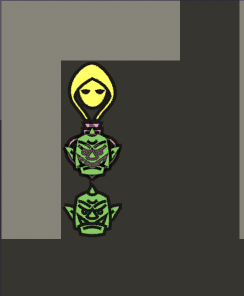
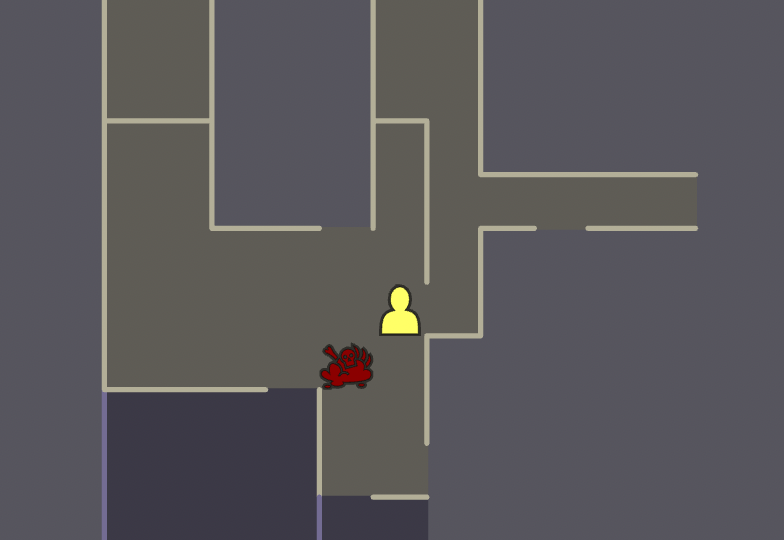
I decided to draw multiple objects in a tile. This works but sometimes it looks messy:
To solve that problem, and also because I like outlines so much, I added outlines:
Drawing all the objects on a tile also fixed a bug I had from last year’s project. I want stairs to be visible even if out of line of sight. They don’t move, so if you’ve seen them, you should remember where they are. But the old code calculated the topmost ascii character to draw. If a monster is over the stairs, and you walk out of view, the stairs wouldn’t be seen. The monster was the topmost tile, and it didn’t get drawn because it was out of view, and the stairs were never checked. Drawing all the objects fixes that bug.
I think it might be also useful to vary the size of the sprites on a tile. The potions seem large compared to the monsters. I’ll experiment with that later.
2.5 Transitions#
The browser supports simple transitions for “free” using the CSS transition property:
.entity {
    transition: transform 0.1s ease-out;
}
Whenever the transform property changes on an .entity, the browser will smoothly transition the transform value:
I chose ease-out and made the transition last 100 milliseconds. If you move faster than that, no problem, as the animation won’t limit the playing speed.
In practice it wasn’t quite “free” because the transitions required that I reuse the SVG DOM nodes instead of recreating them from scratch every frame. That added a little bit of logic, especially because I also can’t reorder them. Instead of applying a total ordering, I split them up into layers 0 through 5, and then the transitions apply whenever the sprite stays in same animation layer. If I had used a rendering library like Preact, Vue, Svelte, React, etc., it would handle this for me.
2.6 Camera position#
The camera is the position in the map that represents the center of the screen. In the Python roguelike tutorial, the camera points at the center of the dungeon. When the player moves around, the map does not. The center of the dungeon is always in the same place. The player moves on screen.
I wanted to point the camera at the player. This means the player will always be in the center of the screen. The dungeon map will move around.
There are two parts to the implementation.
- Drawing: we need to subtract the camera position and add the screen center when drawing. Change code that draws at
x, yto instead draw atx - camera.x + screen_width/2, y - camera.y + screen_height/2. This is how we convert world coordinates to screen coordinates. - Mouse: we need to add the camera position and subtract the screen center from the mouse position. This is how we convert screen coordinates to world coordinates, and it’s the inverse of what we do to convert world to screen.
Since I’m using SVG, I handled the drawing by adding a <g transform=translate(…)> around all the contents. The mouse handling came for free, as SVG already has an inverse function called getScreenCTM().inverse(), and I was already using that, so it handled the new transform automatically.
2.7 Light levels - abandoned#
I tried varying the light level instead of having the two-level visible/shadow. I played with this a little bit but wasn’t happy with the results. Part of the problem is that instead of using brightness, I use a yellow/blue tint for visible/shadow. Whereas in-between values for brightness work, in-between values like for color (like green) make no sense for this.
2.8 Perspective view - abandoned#
The next thing I want to do is make things close to the player larger than things far away. I set the sprite size:
let width =  1 - Math.abs(x-player.location.x)/50,
    height = 1 - Math.abs(y-player.location.y)/50;
I also tried a logarithmic series and a geometric series to vary the sizes, but any of them can give a reasonable effect:
The next step will be to adjust the tile size also. This will create a “fish eye lens” effect. Will it be annoying? In many 3D games you can see detail on the close up monsters while seeing a large area in the distance. But in a top down 2D grid? HyperRogue solves this with hyperbolic geometry but I wanted to see how far I could get while keeping the grid lines straight.
Perspective view

Video showing angle
I did like that monsters down at the end of the corridor looked smaller, and they got larger as you walked towards them. Unfortunately the distortion is distracting at high perspective values, and it’s just not worth it at low perspective values. In addition, CSS transitions no longer work so I’d have to implement transitions manually. It might be worth exploring this again in GL (where I can apply a hyperbolic view), but not in this SVG project.
3 Map#
I’d like to try “thin walls”. I’ve wanted to try thin walls for a long time, and this is my chance. I’ll have to replace the existing thick-wall-based dungeon generator with a new algorithm that generates thin walls. I think this will take most of week 2. I’ll also have to replace the thick-wall-based field of view algorithm, maybe starting with this. I think that may take much of week 3.
3.1 Data structures#
The first thing I had to implement was some way to store the thin walls. I represented them the way I described in this article: 1,1,N is the wall on the north side of tile 1,1, and 1,1,W is the wall on the west side of tile 1,1. On the south side of 1,1 is tile 1,2,N; on the east side is 2,1,W.
The game map data structure I used last year was kind of messy. I had started with a table mapping tile coordinates 1,1 to an object with various properties. But now I need a second table for edge coordinates like 1,1,W. I made a GameMap that contains both tiles for the tile lookup and walls for the wall lookup.
I then implemented rendering for the thin walls. Drawing wall x,y,N means drawing a horizontal line from x,y to x+1,y. Drawing wall x,y,W means drawing a vertical line from x,y to x,y+1. To test this, I added thin walls around the existing thick walls:
It looks good, although there are some glitches with shadow vs lit areas. I think those glitches will go away once I get rid of thick walls.
3.2 Map generation teardown#
I have previously tried making a dungeon generation algorithm based on breadth first search (flood fill), but never finished it. The idea is to pick a point, inflate it up to a preset limit to form a room, then pick another point, inflate it, and so on. I looked through the code I wrote then, and I think thin walls make this dungeon generator easier. The logic for building walls was tricky with thick walls, as I had to scan ahead to see whether a wall could fit. With thin walls, they always fit.
Every time I tried to write that algorithm, I had a mental block. I decided to take a smaller step. I ripped out the old map generator and put in a placeholder. I figured the placeholder would be a smaller step than the full generator:
I noticed here that there’s a problem. The rooms get walls on the north and west side but not the east or south side. That seems like a bug with my edge logic, since I represent north and west sides differently from east and south sides. To narrow down the bug I reduced the map to a single room, and found the same problem. Good. I have a reproducible test case. It turned out to be the old FOV algorithm interfering with the drawing of walls, so I took out the old thick-wall FOV.
Now is when it gets a bit demoralizing. I’ve had to take out the dungeon generator and FOV, which also means I lose lighting / shadows. Removing the old map generator also broke some other things, like the monster generation. The original tutorial code assumes that rooms are rectangular:
for i in range(number_of_monsters):
    x = random.randint(room.x1 + 1, room.x2 - 1)
    y = random.randint(room.y1 + 1, room.y2 - 1)
Last year I was following the tutorial closely so I also had rectangular rooms. My new map generator does not make all rooms rectangular, so I changed it to keep a list of tiles per room, and then selected a tile randomly.
I ended up removing the save/load feature. Last year I had tried limiting the data structures to be JSON-compatible so that it would be easy to save and load, but I ended up complicating the code to support it. I decided it’s not worth it for this year’s project.
Removing the old map generator and putting in a placeholder let me find all the places in the code that were making assumptions about how the map generator worked. It was also a reminder to myself that when I get stuck, I should break the problem down into smaller pieces so that I can make progress with smaller steps, even if those intermediate steps will get thrown away later.
3.3 Map generation rebuild#
Time to write the new map generator. Fortunately I had already figured out the logic in a previous miniproject. It was for thick walls and I needed to adapt it for thin walls.
- Pick lots of starting points for room growth.
- Pick a random limit for each room’s side.
- Use breadth first search to expand the room until it hits either the limit or another room.
And … that’s about it for rooms! In the previous project I had to handle lots of little cases where I want to expand the room but can’t, so I need to leave space for a wall. In this project I didn’t have any of those special cases. The core bfs loop is:
let start = seeds[roomId];
if (gameMap.tiles.has(start.x, start.y)) {
    // This room was placed inside an existing room, so skip it.
    continue;
}
let queue = [start];
let queueIndex = 0;
gameMap.tiles.set(start.x, start.y, {roomId, walkable: true, explored: false});
while (queueIndex < queue.length) {
    let current = queue[queueIndex++];
    let neighbors = DIRS_8.map(([dx, dy]) => ({x: current.x + dx, y: current.y + dy}));
    for (let neighbor of neighbors) {
        if (neighbor.x < left || neighbor.x > right
         || neighbor.y < top || neighbor.y > bottom) {
            continue; // out of bounds
        }
        if (!gameMap.tiles.has(neighbor.x, neighbor.y)) {
            gameMap.tiles.set(neighbor.x, neighbor.y,
                              {roomId, walkable: true, explored: false});
            queue.push(neighbor);
        }
    }
}
gameMap.rooms[roomId].tiles = queue;
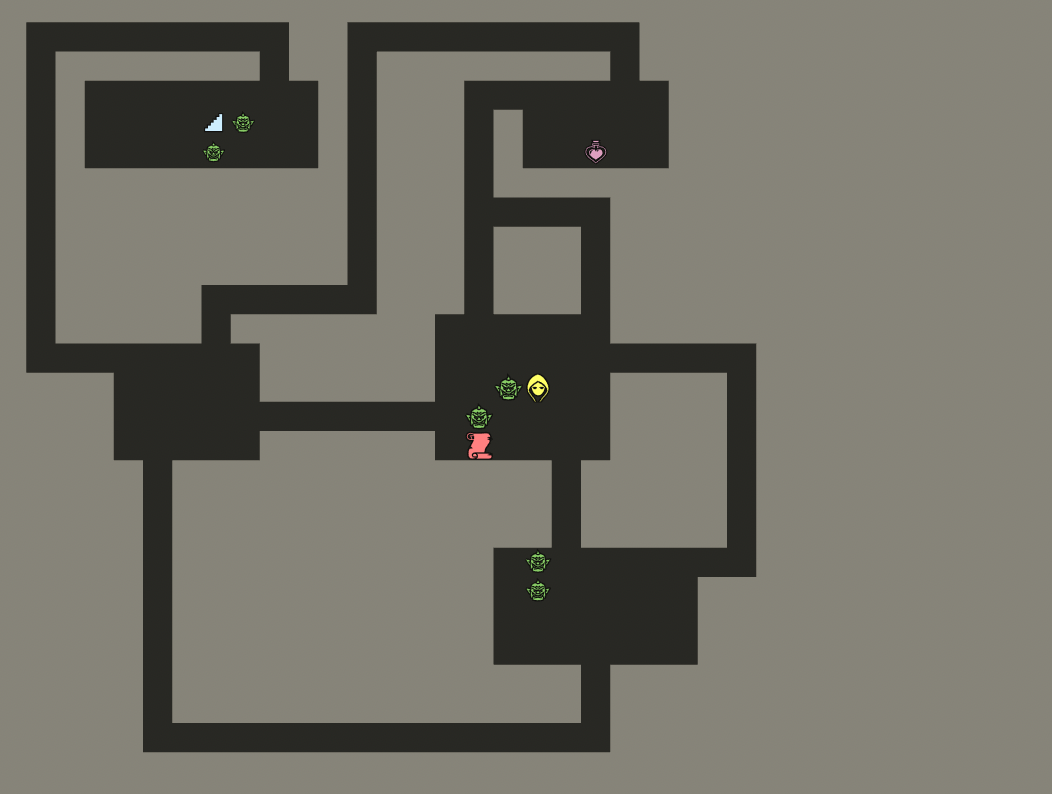
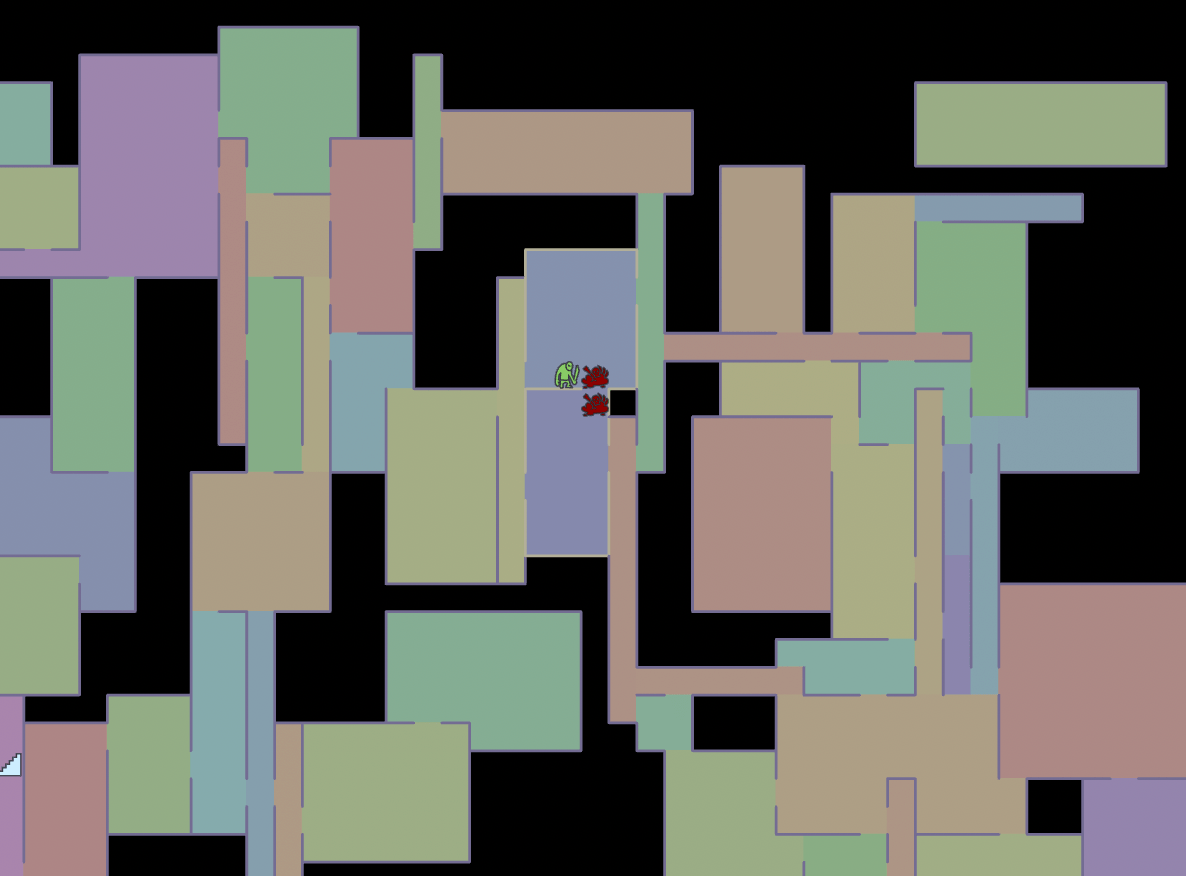
It generates rooms like these:
They’re mostly rectangles but also some L-shaped and occasionally even more interestingly shaped rooms.
Where do the walls go? I place a wall at any edge between two tiles that are part of different rooms. That logic is much simpler than for thick walls.
The next step is to add doors. I started by making a list of all walls between each pair of rooms, e.g. a list of walls between room 3 and 5. Then I removed a random wall from that list to leave a doorway:
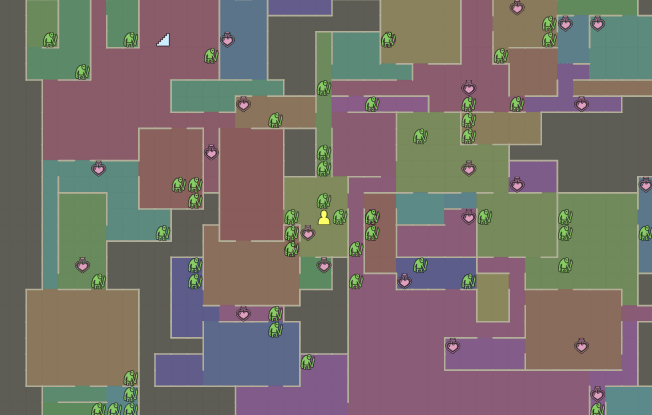
I think there are too many doorways here. I’m taking every pair of rooms that touch and making a doorway between them. To do something smarter, I’m going to have to build a room graph and decide on connectivity. Maybe a minimum spanning tree? Special cases for corridors? Those are problems for another day.
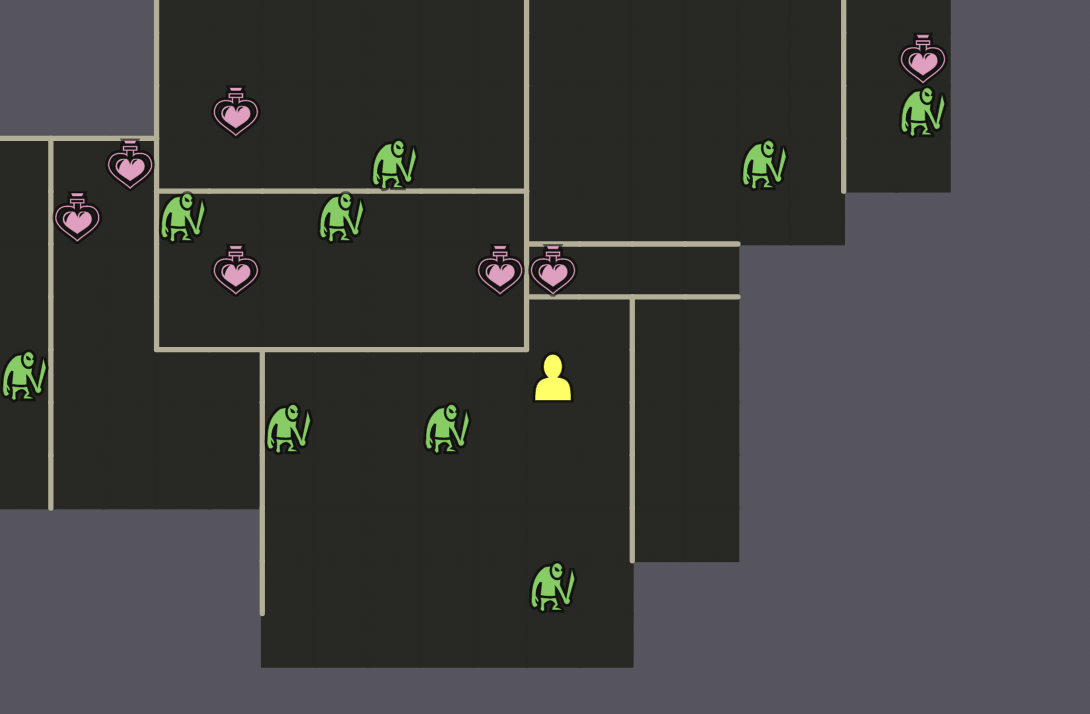
The new maps lead to a problem: there are too many enemies. This is because there are more rooms, the rooms are smaller, and the lack of FOV means that all enemies move towards the player.
4 Field of view#
In week 3 it was time to work on the field of view algorithm. Some choices:
- use polygonal field of view using Asano’s sweep algorithm (1985)
- use polygonal field of view using the fairly new triangular expansion algorithm[9] (2014)
- create my own algorithm based on recursive shadowcasting[10]
What I should do is use my existing working code for the sweep algorithm. Since it’s not designed for tile worlds, I’d convert the input grid into the format it needs, run the algorithm, then convert the polygon output into tile data. That’s a common pattern — an algorithm may not be exactly what you need but you can adapt the input, run the algorithm, and adapt the output. Once I get that working then I can go back and try something more ambitious like implementing triangular expansion or inventing my own algorithm. But nooooo, I got distracted trying to make my own algorithm and wasted the whole week on it. So now I have nothing to show.
4.1 Room-based visibility#
While working out the details of how field of view should work, I realized that even though field of view is cool, part of what I’m doing in this project is doing things differently. I’m revisiting each topic from the tutorial but I want to solve them in a different way. In this case I want to shift the thinking from tiles to rooms, and from rooms to levels. So that means visibility would be across an entire room, and monster/item placement would be across an entire level.
Unfortunately I realized this a week too late, as I have come up with a nice algorithm for tile-based field of view! (I haven’t finished implementing it yet)
So I’m going to put the tile-based and polygon-based visibility algorithms on hold, and describe what I want to see from room-based visibility:
- There are doors between rooms. You can’t see beyond a room.
- You have to open a door to look into it; this takes a turn.
- When you go through the door, it closes behind you (maybe — undecided). This means you can only see multiple rooms when you’re standing at the doorway, on either side of that opening while the door is open.
- You see the entire room you’re in. Concave rooms are visible too, as though they were convex.
- The monsters in the room see you. The monsters outside the room don’t, until you open a door.
- There’s no invisibility due to pillars.
To make this work I need to go back and change the data structures to let me focus on rooms and also doorways. Since I spent Week 3 on an algorithm I’m not going to use, I spent Week 4 implementing this.
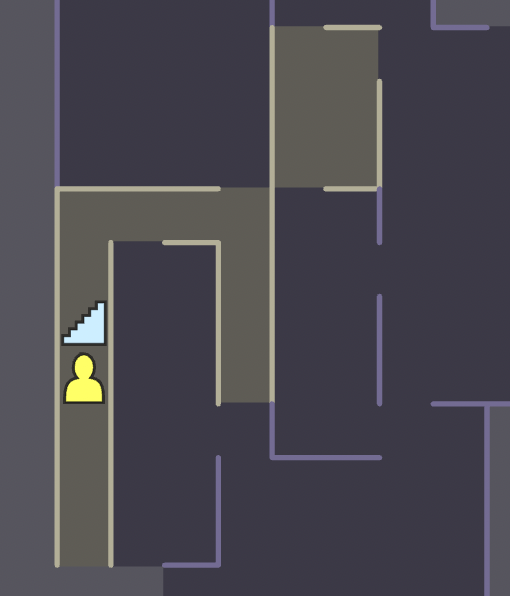
How well did it work? Well, it was ok but I’m not happy with it. Here’s a single room lit up:
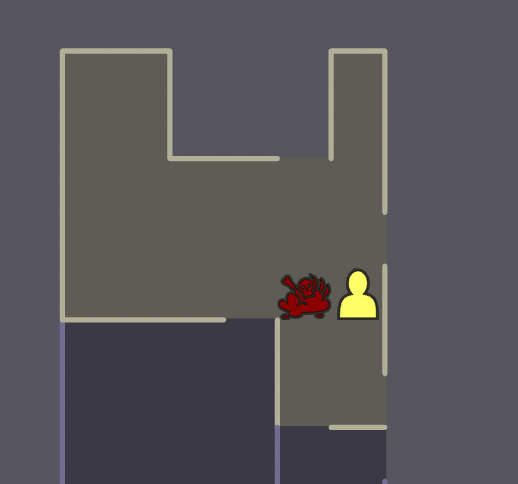
Here’s an adjacent room lit up when standing at the door:
But it turns out the map generator generates some weird rooms, like this “one”:
I hadn’t noticed this before, but room-based visibility makes it quite apparent. Even though the maps aren’t working well, at least the game is working again.
4.2 Another map generator#
To solve the map problems, I changed the algorithm from flood fill to this:
- Pick lots of starting points for room growth.
- Alternate expanding horizontally and vertically
- Expand to an adjacent tile only if the previous tile was already in the room
This is probably going to need more of an explanation one of these days.
let left   = start.x;
let top    = start.y;
let right  = start.x;
let bottom = start.y;

for (let distance = 1; distance <= Math.max(roomSize.w, roomSize.h)/2; distance++) {
    if (distance <= roomSize.w/2) {
        expand(left, top, left, bottom, {dx: -1, dy: 0}); left--;
        expand(right, top, right, bottom, {dx: +1, dy: 0}); right++;
    }
    if (distance <= roomSize.h/2) {
        expand(left, top, right, top, {dx: 0, dy: -1}); top--;
        expand(left, bottom, right, bottom, {dx: 0, dy: +1}); bottom++;
    }
}
The helper function will expand a rectangle of tiles in one direction:
function expand(x1: number, y1: number, x2: number, y2: number, {dx, dy}): void {
    for (let x = x1; x <= x2; x++) {
        for (let y = y1; y <= y2; y++) {
            if (gameMap.tiles.get(x, y)?.roomId === roomId
                    && !gameMap.tiles.has(x + dx, y + dy)) {
                gameMap.tiles.set(x + dx, y + dy, {roomId});
            }
        }
    }
}
With this new code, rooms will not expand through diagonal corners. The rooms are a little less interestingly shaped but on the other hand they should be easier to work with, especially when I want to populate them with objects.
I still have a problem with disconnected rooms. My plan is to use a connected components algorithm to find the largest connected component, then discard the rest.
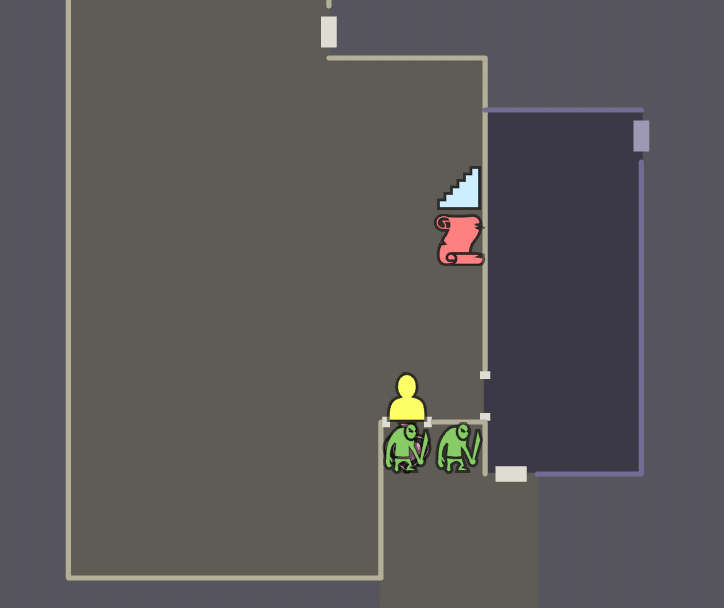
4.3 Opening doors#
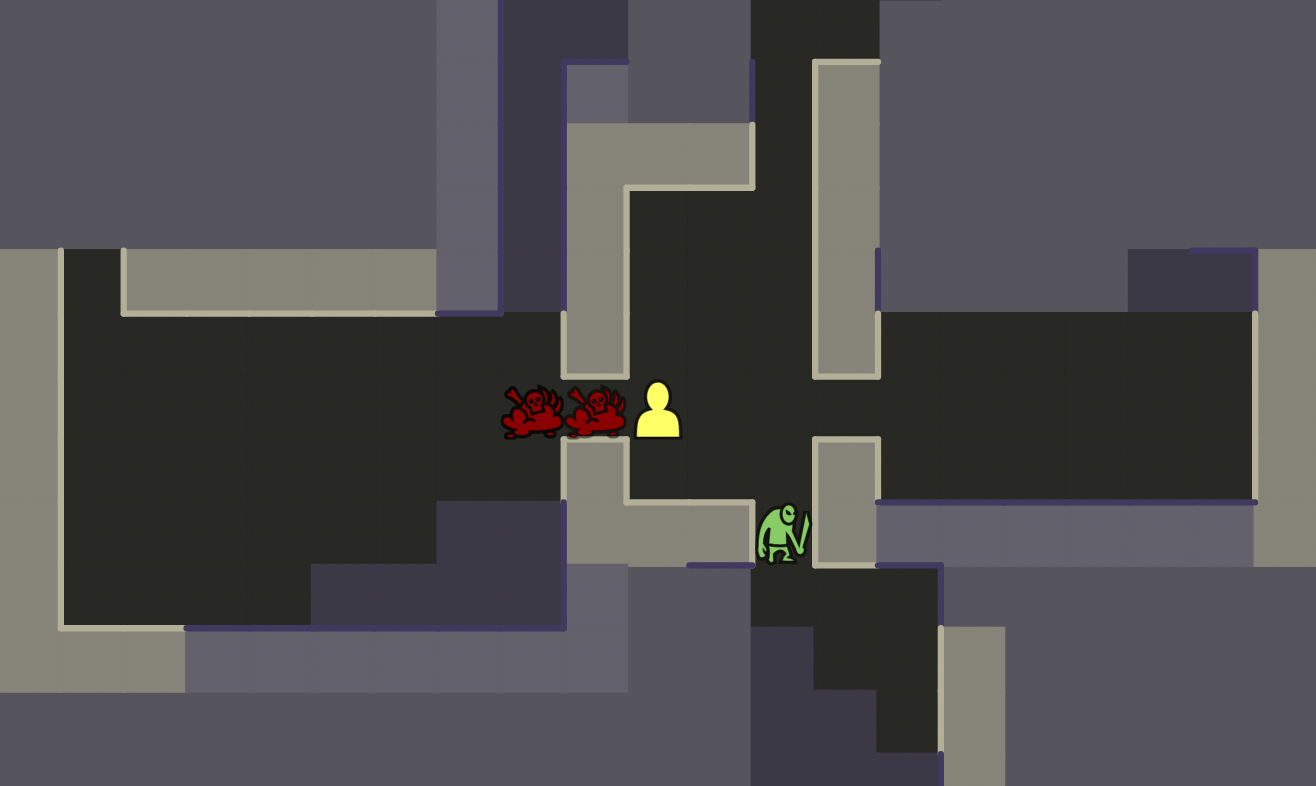
As part of room-based visibility I wanted doors that block vision until you open them. This took some time, as I implemented several different approaches until settling on a Map from edges to an enum: wall | closed-door | open-door. In this screenshot you can see both closed and open doors.
Sometimes when I can’t figure out how to do the thing I actually want to do, I’ll refactor adjacent code to help me think about the problem. In this case, I cleaned up the representation of walls, room connections, and tiles, and had an “aha” moment for how I wanted to represent the doors. It simplified not only the data structures but also the visibility code.
5 Inventory#
I’ve been wanting to try something different for inventory, and I decided I would keep the inventory visible on screen at all times. I’ll limit the number of slots but add some stacking. One of the ideas I played with last year was was merging equip and use so that when you use a weapon or armor, it will equip it, and simultaneously unequip what you previously had. I’m thinking of going farther with this, merging equip and pick up, so that as soon as you pick up an item you swap it with what you had. This would mean you can never hold onto extra equipment.
5.1 Inventory UI#
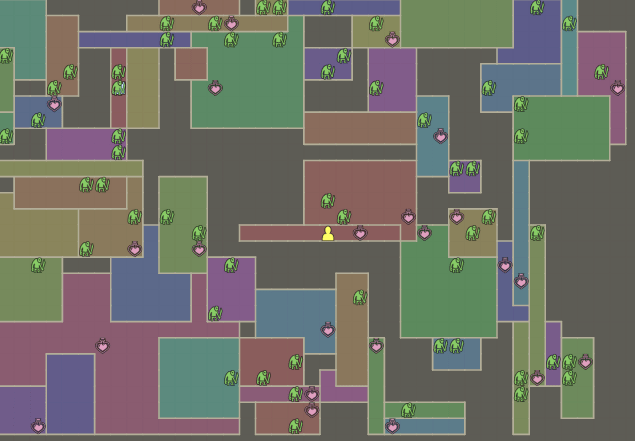
The first step was to take the existing <svg> element and subdivide it, so that part of it is for the game map and part of it is for inventory:
As a bonus, this split allowed me to adjust the size of the debug view. When you press o, it now zooms out to show more of the map. For the underlying implementation I use an SVG transform on the two sides of the UI, and transforms can be easily animated using CSS transitions.
5.2 Equipment swaps#
Previously, you could pick up an item and then separately you could swap it with your equipped item. As part of this inventory/item redesign I am changing the rules. You can’t hold equipment in inventory. No more going through the dungeon holding 14 shields in your backpack. Instead, as soon as you pick up an item, you equip it, and you drop the item you previously had equipped.
The tricky logic for swapping was in swapEquipment. It handled swapping an inventory item with an equipped item. I changed this to handle swapping a map item with an equipped item. The function isn’t used anywhere else so I didn’t try to generalize this into swapping any item with any item. I’ll do that only if I actually need that functionality. (“YAGNI”)
5.3 Inventory slots#
Inventory items are now only consumables. I want them to be stackable. I decided that instead of each item taking up a slot in your inventory, each item type takes up a slot. I think this makes the UI simpler but the gameplay less roguelike, but since this is an experimental project I wanted to see where this would lead.
Previously inventory was an array with 25 entries, each containing either an entity id or null. I changed this to a set with unlimited entries, each an entity id.
I’ll adjust the game balance later.
6 Items#
I really like the replay in Hades and Brogue, and wonder how much of that I can do with items and how much from maps or something else. Slay the Spire may be some inspiration here too, as some of the cards can significantly change the way you play.
7 Enemies#
TODO: ideas for handling enemies differently
I’d like to make the enemies do more interesting things. One of the ideas for this project is to make the logic run at the room level instead of the individual tile level. In the previous section I described doing that for visibility. I’d also like to do this for enemies. Within a room, maybe enemies can work together somehow.
-
[ ]sidekicks — a monster might stay near another so that they can both attack the player together -
[ ]henchmen — a monster might be able to call allies in nearby rooms -
[ ]factions — there might be monsters who are unfriendly towards one another, and they might already be fighting each other when the player enters the room; one option would be to stay out of the way and sneak past them -
[ ]movement — instead of always moving towards the player, monsters might patrol a fixed route, or guard a treasure, or only move towards you if startled or if you get close or if you make a sound (I’d have to add sounds) -
[ ]spawning — instead of all monsters having spawned at the beginning, monsters might spawn other monsters, or generators might spawn monsters (but I need to be careful that these are not an infinite xp source)
I’d also like to change enemy spawning from being per room to being per level. This could include
-
[ ]choosing how many monsters are on the main path vs side paths -
[ ]placing bosses at the ends of side paths, guarding treasures -
[ ]placing a big boss at the end of the level
This will require map analysis, which is a whole ‘nother topic.
8 Combat#
TODO: ideas for doing combat differently
9 Controls#
TODO: ideas for changing the control scheme
How about W A S D controls? Or maybe entirely mouse-driven?
10 More map stuff#
-
[ ]The map generator is too “open” because it connects all adjacent rooms. I’d like to turn this into a graph and form a minimum spanning tree or some other structure that constraints movement a little more. -
[ ]identify main path vs side paths? -
[ ]identify loops? -
[ ]key and lock? but this may be boring so I’d want to use it sparingly -
[ ]special rooms that behave differently from regular rooms, like cathedrals, shops, training grounds -
[ ]decorate rooms with static items like torches and tapestries